What’s new on ArcheAge World: a guide to every tool and control
Since our 27 October roundup, ArcheAge World has grown beyond its first calculators. This guide covers the pages, options and controls available as of 9 November 2026, feature by feature. Previously announced basics are included for context: these are website features, not game patch notes or individual data corrections.
Previous roundup: new interactive databases and tools · 2026-10-27
1. Navigation and quick search
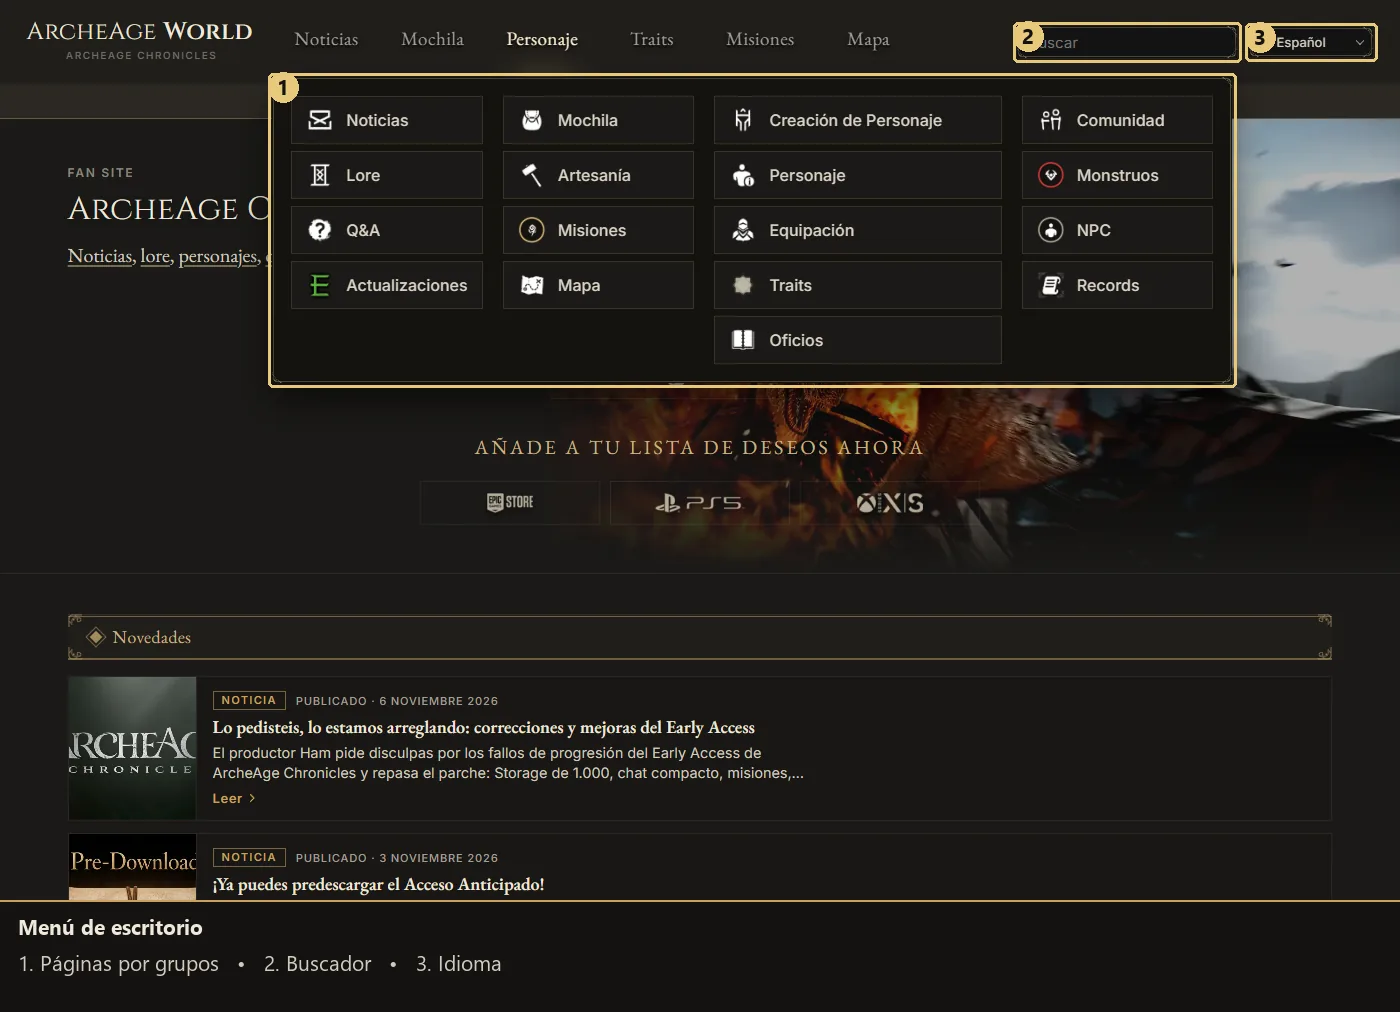
- Grouped menu: hover over or focus a top tab to reveal Game, Tools and Character Creation, then choose the page you need.
- Home and language: the ArcheAge World name returns to the homepage; the language selector opens the matching page in any of the 11 languages.
- Quick search: type in the header and open a suggestion; More results takes you to the full search page.
2. Character, classes and statistics
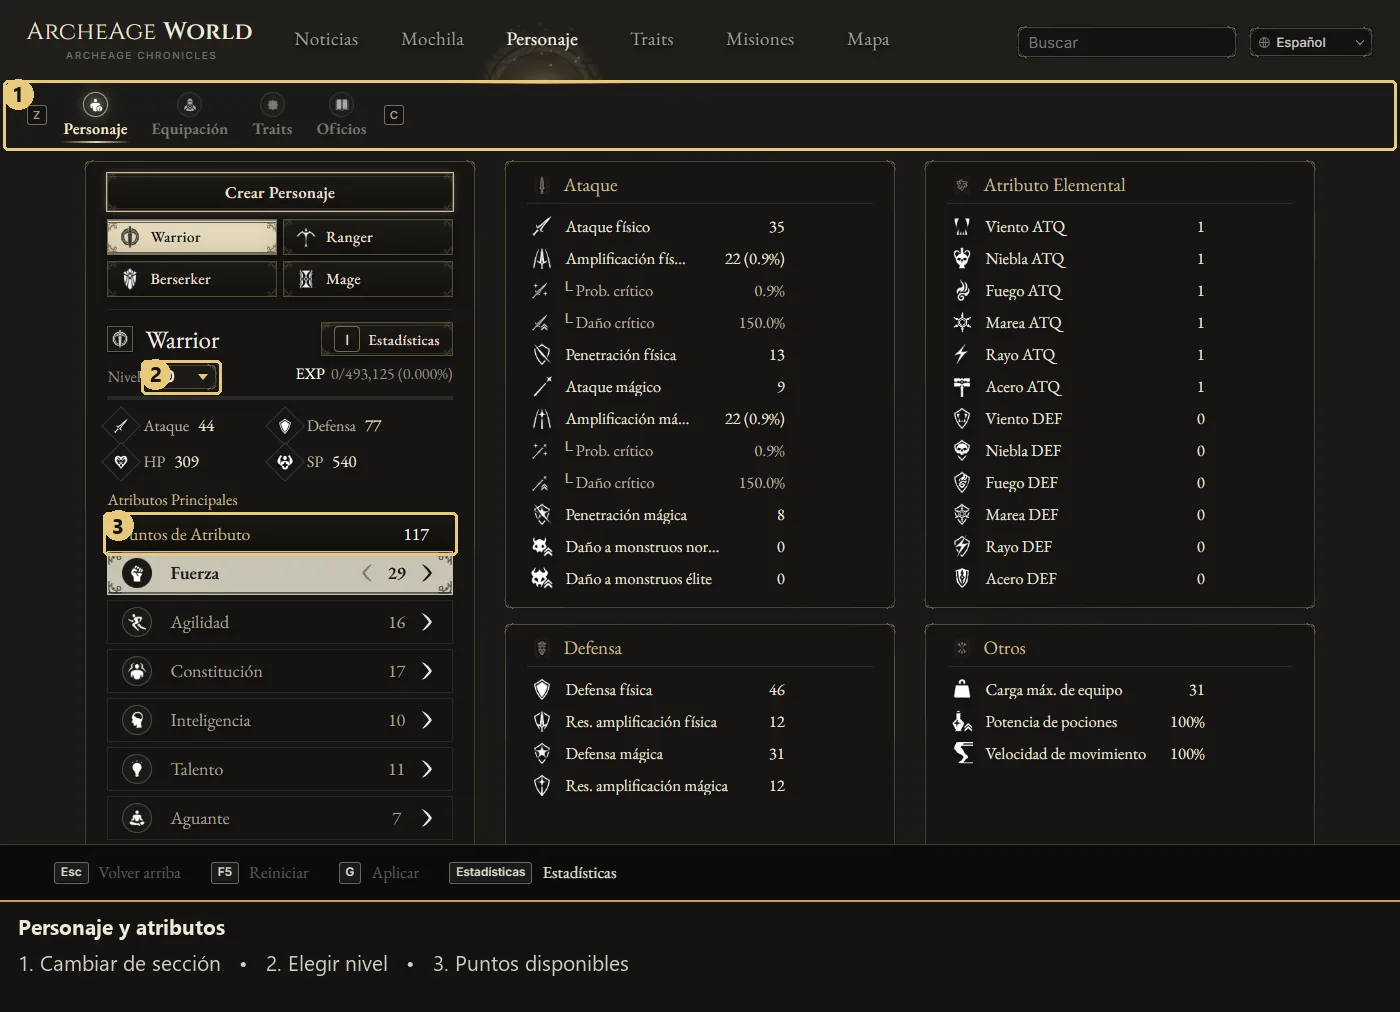
- Four classes: choose Warrior, Ranger, Berserker or Mage, set a level and allocate attributes with the arrows. Hover over an attribute to preview its effect.
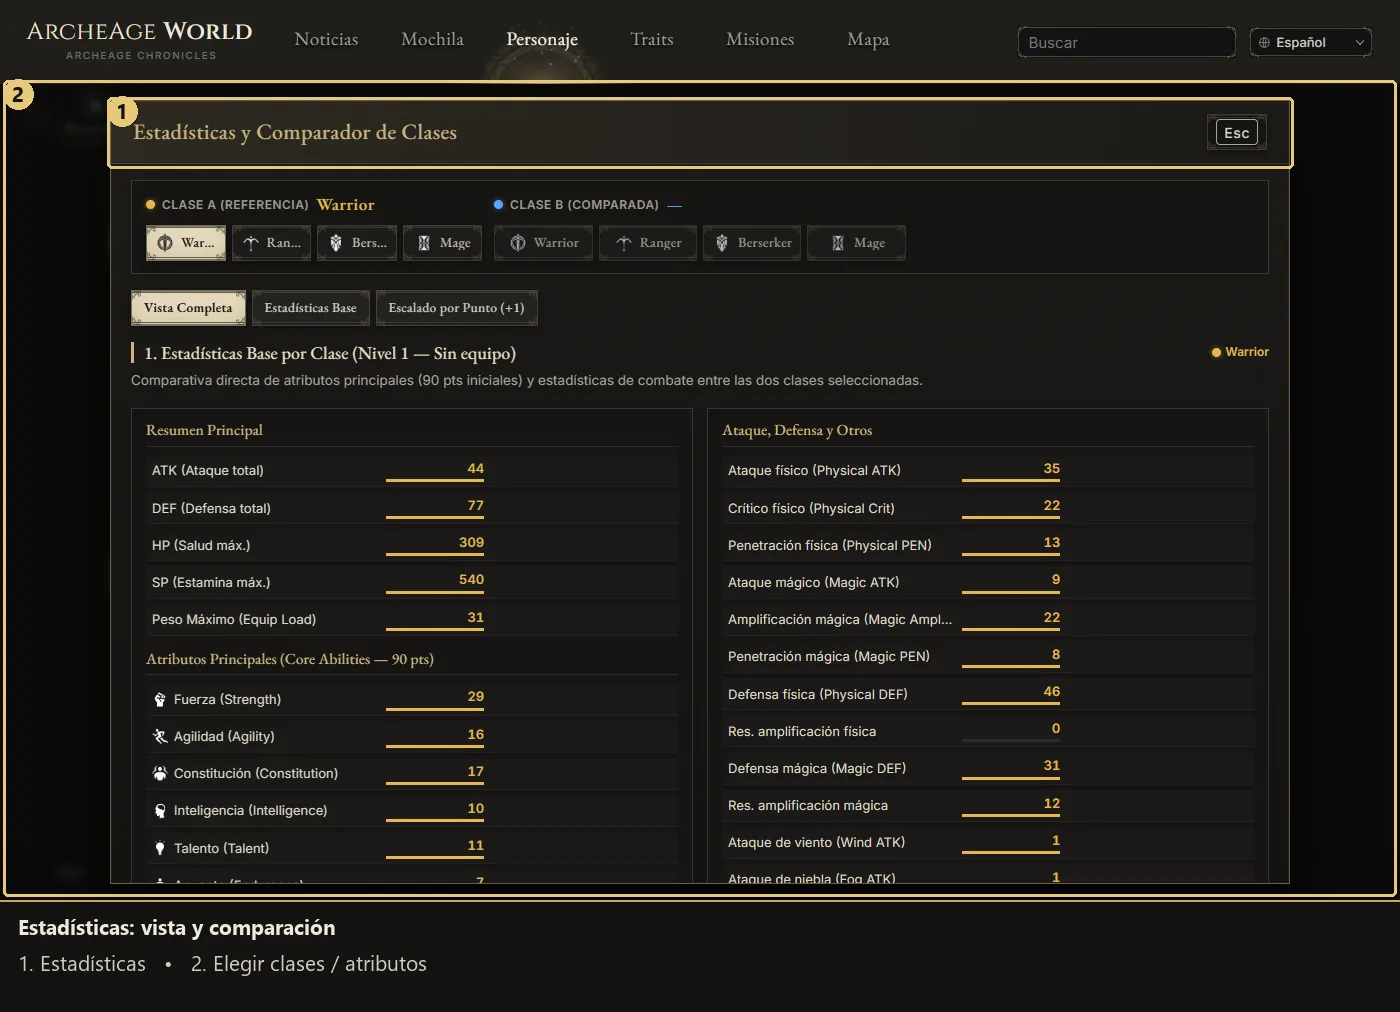
- Statistics: use the button or I; inspect attributes, choose a second class for comparison and swap sides. Class articles provide a return link to the originating screen.
- Local draft: changes are remembered in this browser even before you create a character. This uses local storage, not an account or cross-device sync.
- Create character: name the setup, continue through Equipment, Traits and Proficiencies, save or copy its link. Publishing creates a summary of stats, gear, points and costs; it is not the same as saving a draft.
- Community Characters: visit /builds/, filter by class or name and open published summaries. On a local server, publishing stays in that browser only.
- Statistic views: switch Full View, Base Stats and Scaling per Point (+1); class B stays empty until you choose it.
3. Equipment: build and refine your loadout
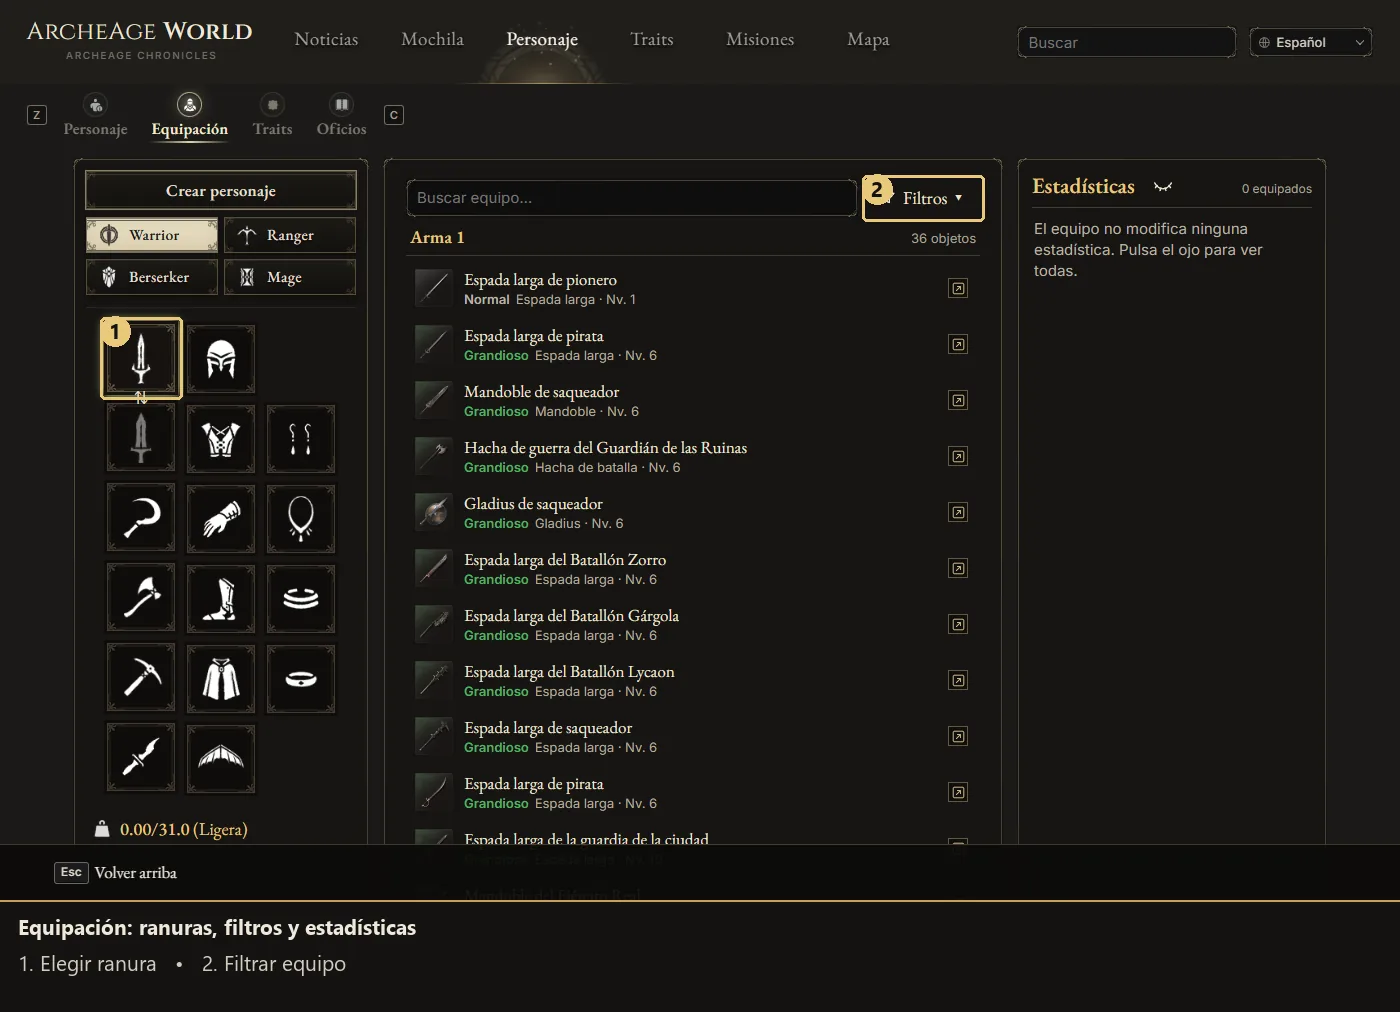
- Slots: select a slot, search for a piece and equip it; use the swap button to switch between your two weapons.
- Filters: combine the available grade, type and stat filters; remove active filters through their chips.
- Upgrades: adjust Tempering and its materials, random options and Lunaestones in the relevant item panel.
- Results: check weight, load category and modified stats; the eye reveals the remaining stats too. Item links open full database entries.
4. Crafting and production trees
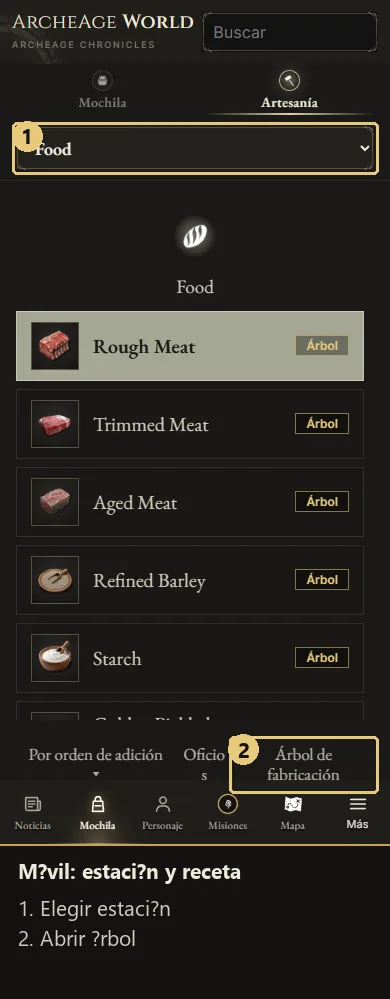
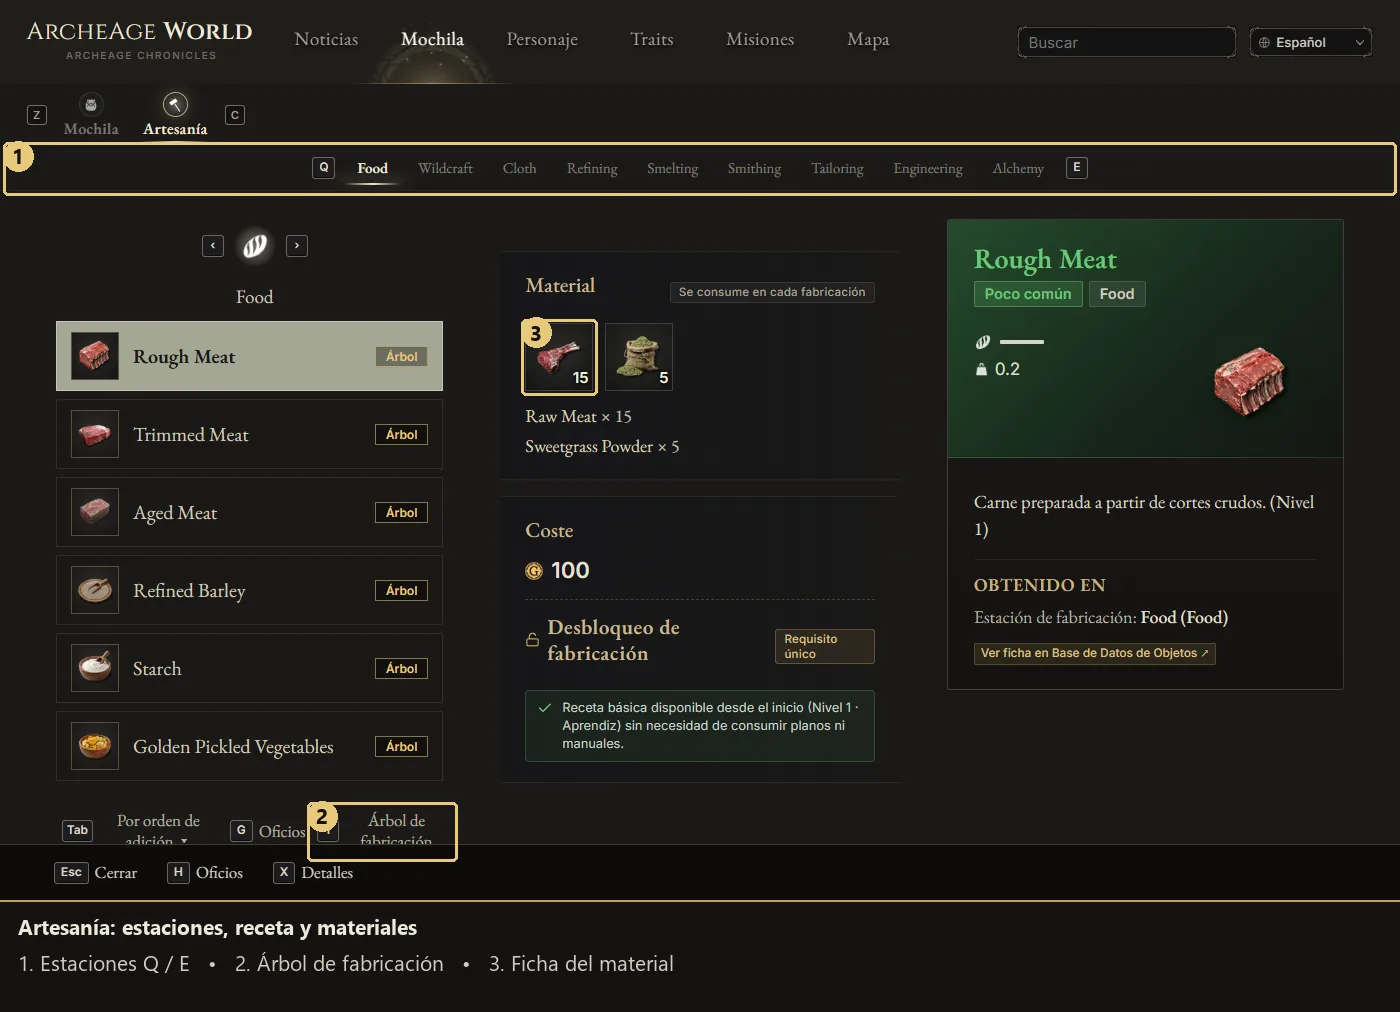
- Nine stations: Food, Wildcraft, Cloth, Refining, Smelting, Smithing, Tailoring, Engineering and Alchemy. Q/E switches station; use the selector on mobile.
- Recipes: choose a category and recipe to inspect output, ingredients and costs. Per-craft consumption is separate from one-time unlock requirements.
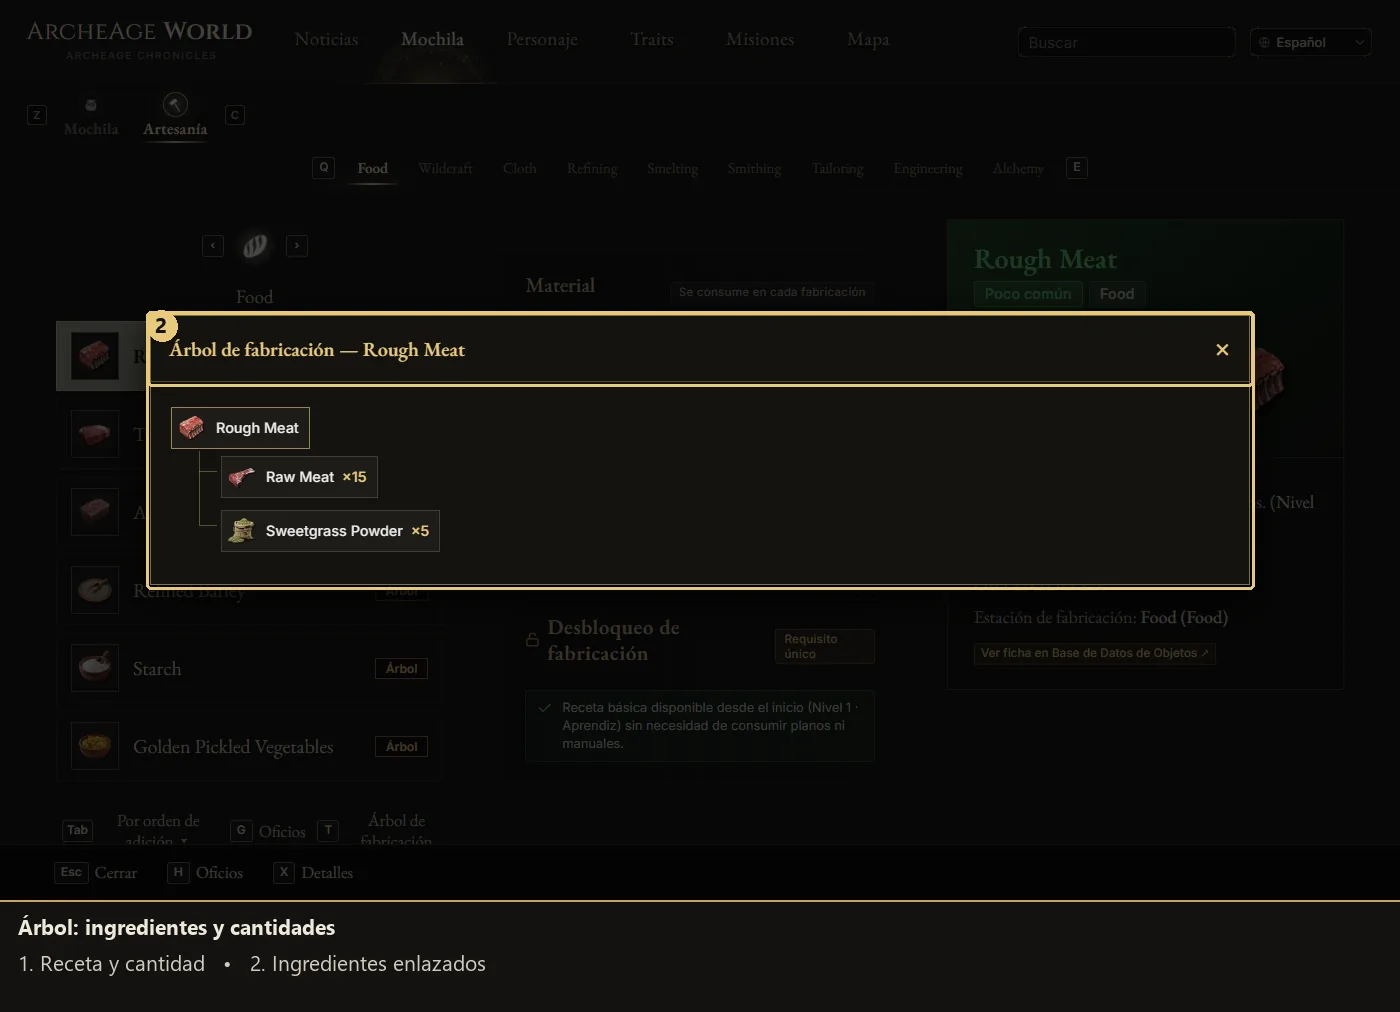
- Tree: click the production tree button or a recipe’s Tree label; change the quantity to recalculate ingredients and intermediate crafts recursively.
- Details: select ingredients or tree nodes to inspect them and follow their links to the item database.
5. Proficiencies and manuals
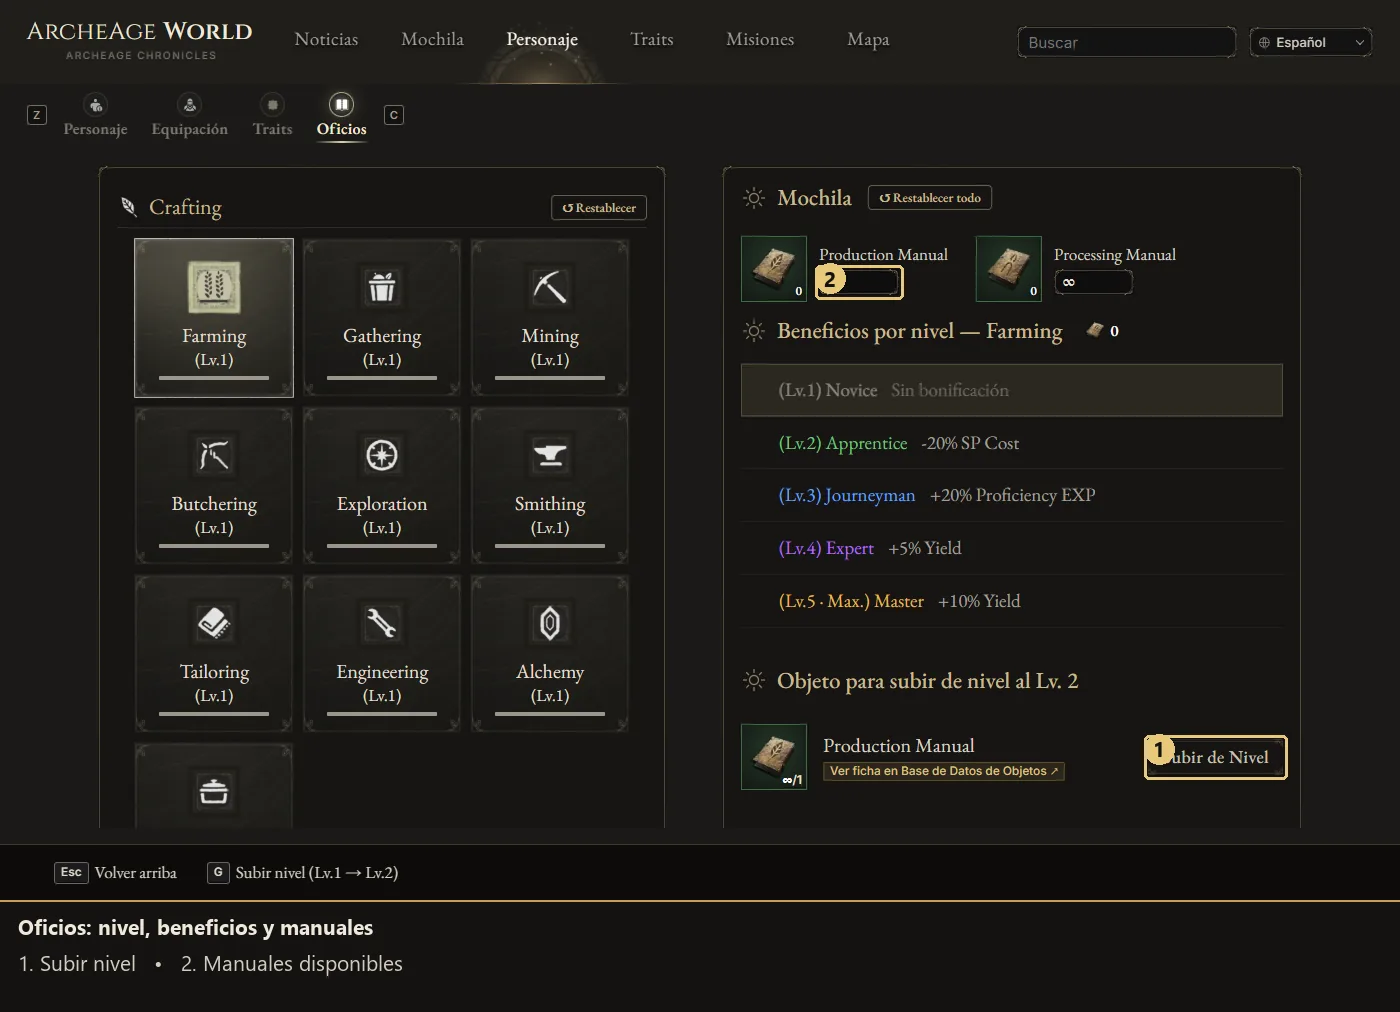
- Planning: select a proficiency to inspect level benefits, the next requirement and its level-up action.
- Manuals: enter your Production Manual and Processing Manual supplies to track available and spent amounts; reset a group or everything with the relevant buttons.
- Maximum level: Lv.5 shows Max. and no longer requests a level-up item. X opens manual details and G attempts an available level-up when you are not typing.
6. Traits: deeper information and tree controls
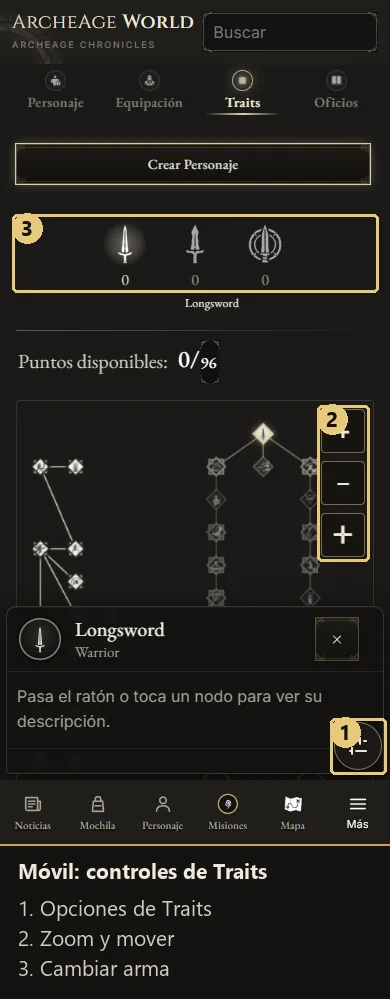
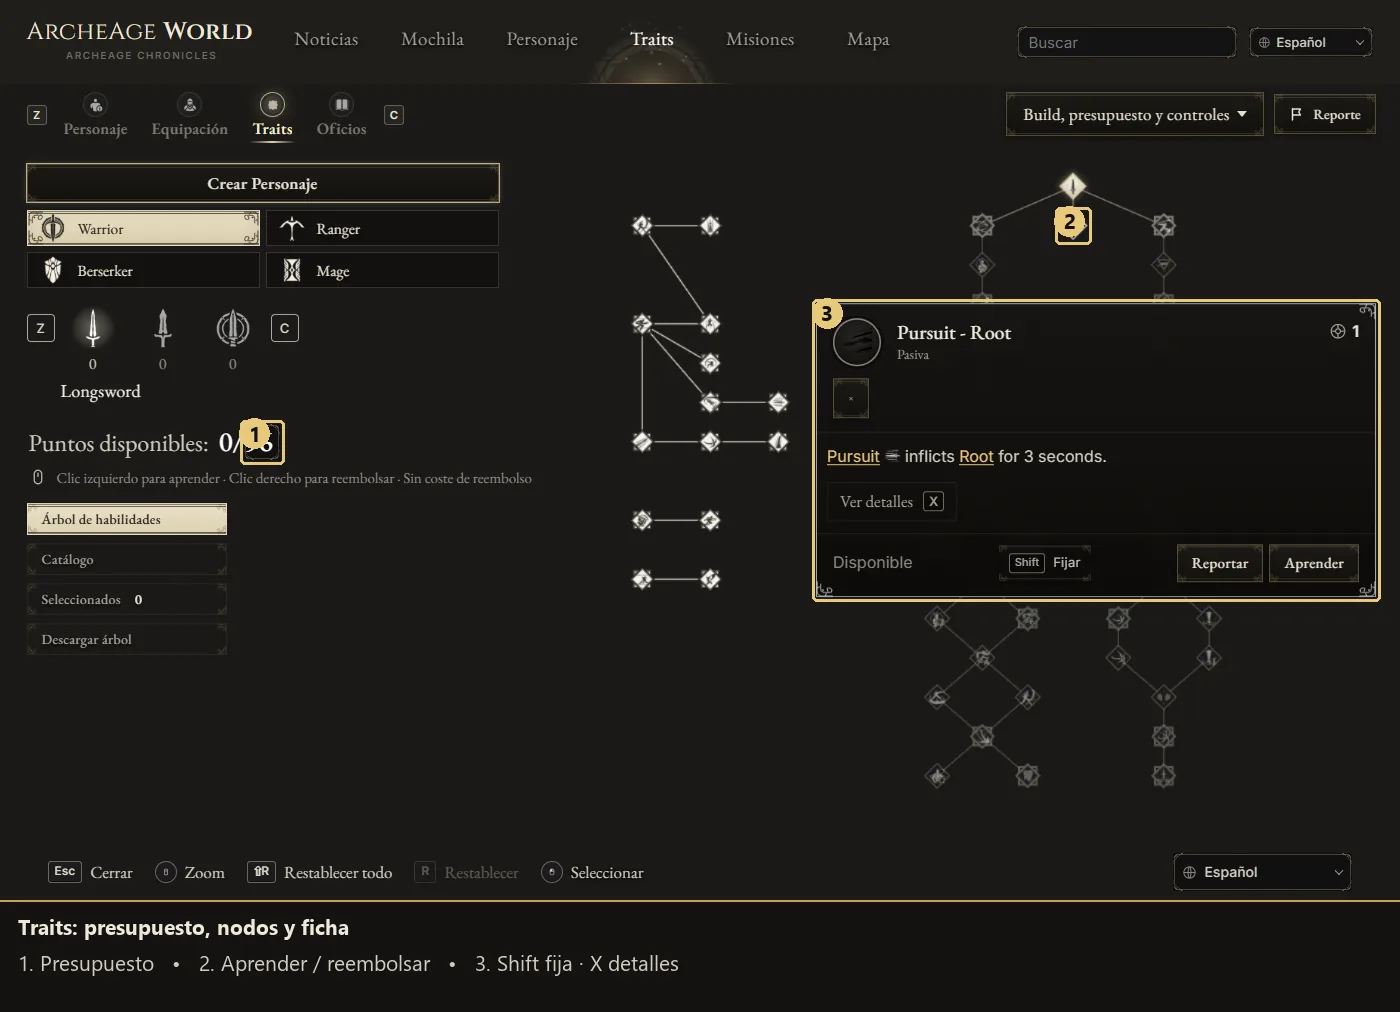
- Budget: adjust available points and select your class and weapon. Z/C also cycles through the weapon bar.
- Learn: left-click an available node; right-click to refund, subject to the tree’s requirements and dependencies.
- Pinned card: on desktop, Shift toggles pinning; X expands details. The Statistics button, or I while a card is open, shows the available skill numbers.
- Views: switch between Tree and Catalogue, inspect Selected and download an image of the tree.
- Controls: open the controls panel to inspect keyboard or controller actions and bindings. Follow the on-screen buttons: the same letter can do different things in different sections.
- Control files: save your bindings to a file, load a saved configuration or restore defaults from the controls panel.
7. Quests and embedded maps
- All and categories: switch between All, Story, Company, Region and Event/Job Board; Z/C cycles categories and arrow keys move through quests.
- Details: inspect objectives, dialogue and rewards; reward items link to their entries, and quests have direct links.
- Location: zoom, drag and select icons in the small map; View on map, or X when available, opens the full map. A quest without a known location does not receive an invented marker.
- Reports: new-quest and existing-quest reports open editable proposals with change tracking and undo. Review the form before sending it.
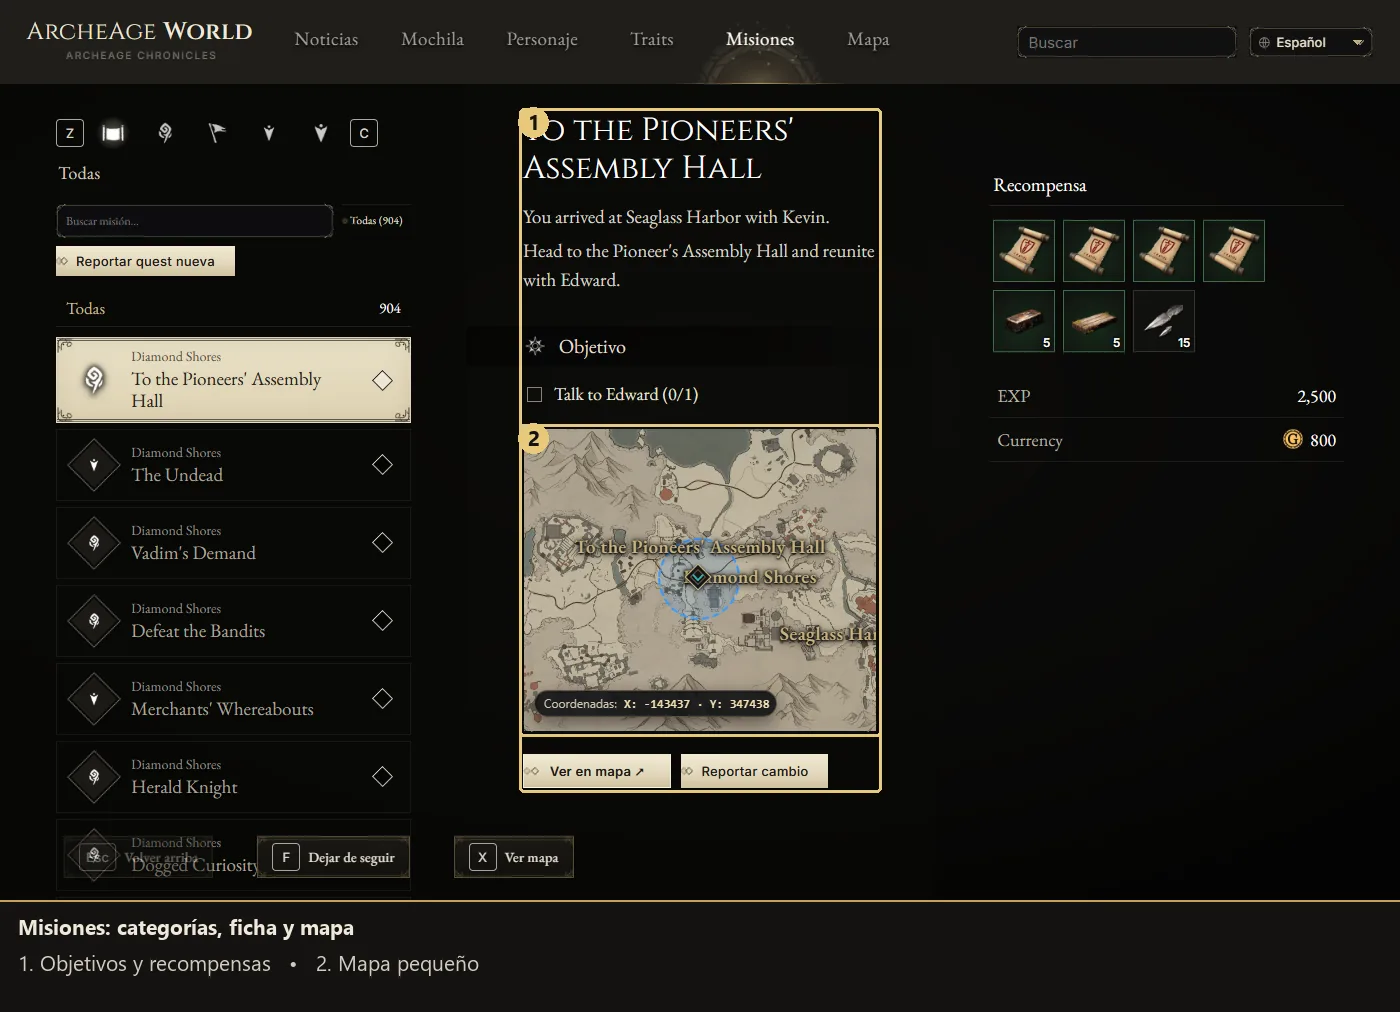
8. Map: every option, step by step
- Views: switch Current Map and Full Map; drag to pan and use the wheel or +/− to zoom. The home button resets the view.
- Layers: open the legend; the master, category and row eyes control visibility. Fold arrows collapse groups.
- Sizes: sliders adjust all icons, a category or a type. Size adjustments reset on a new visit.
- Spoilers: reveal Exploration and Gathering through their eyes. These layers and blue quest circles were already covered in the previous roundup; they remain optional.
- Search: type original game names such as Iron Ore or Wolf and select a suggestion. UI and results use available translations; arbitrary translated-name queries are not guaranteed.
- Items and sources: an item result lists dropping monsters, gathering points and related stations; links filter the map. Remove the filter chip to return to the general view.
- Monsters and NPCs: filter categories and levels; clusters show a count and separate as you zoom in. Overlapping icons fan out on hover or tap.
- Cards: select an icon for information, loot, services, shops or dialogue where available. In a conversation, F advances and arrows select an answer.
- Quest focus: choose a quest through its NPC or card to frame its objectives and show related elements only. Clearing the selection restores previous layers.
- Pins: right-click, long-press or use the pin button to place a marker; drag or remove it, clear all pins and copy a link containing several points.
- Report: enable the mode to propose places, icons or quest points and move elements. On desktop, hold Space to pan while editing. Nothing is published automatically.
- Map keys: F toggles the pointed category and G opens the Exploration List; during dialogue, F advances the conversation instead.
- Coordinates: the X/Y bar displays the pointer position, or the map centre while panning.
- Gathering card: open a resource to inspect its output items, quantities and chances where available; item links open their entries.
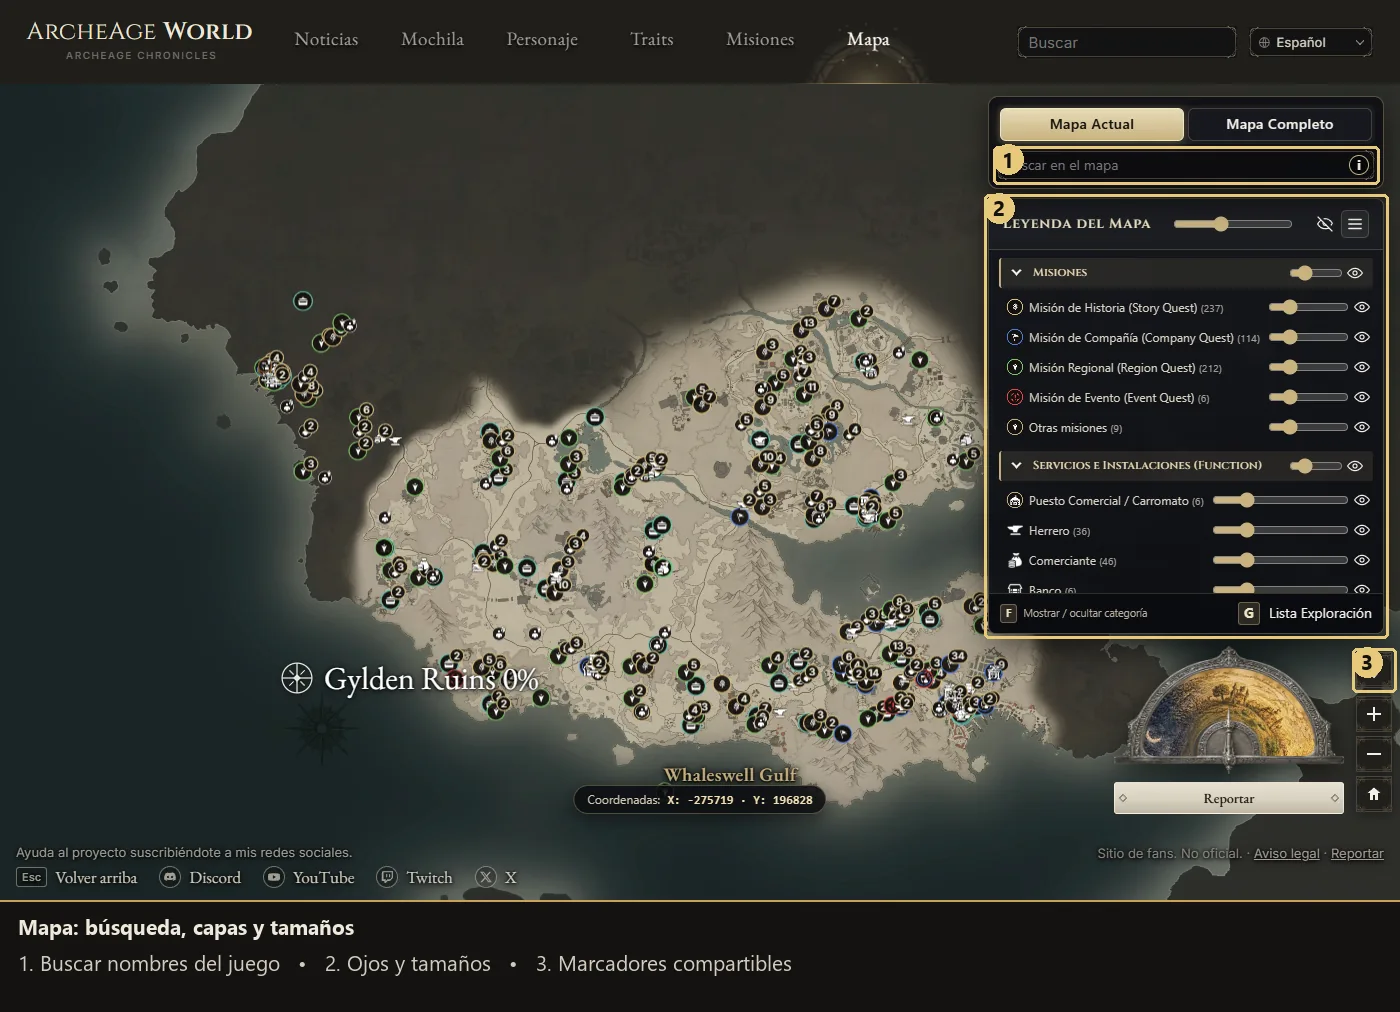
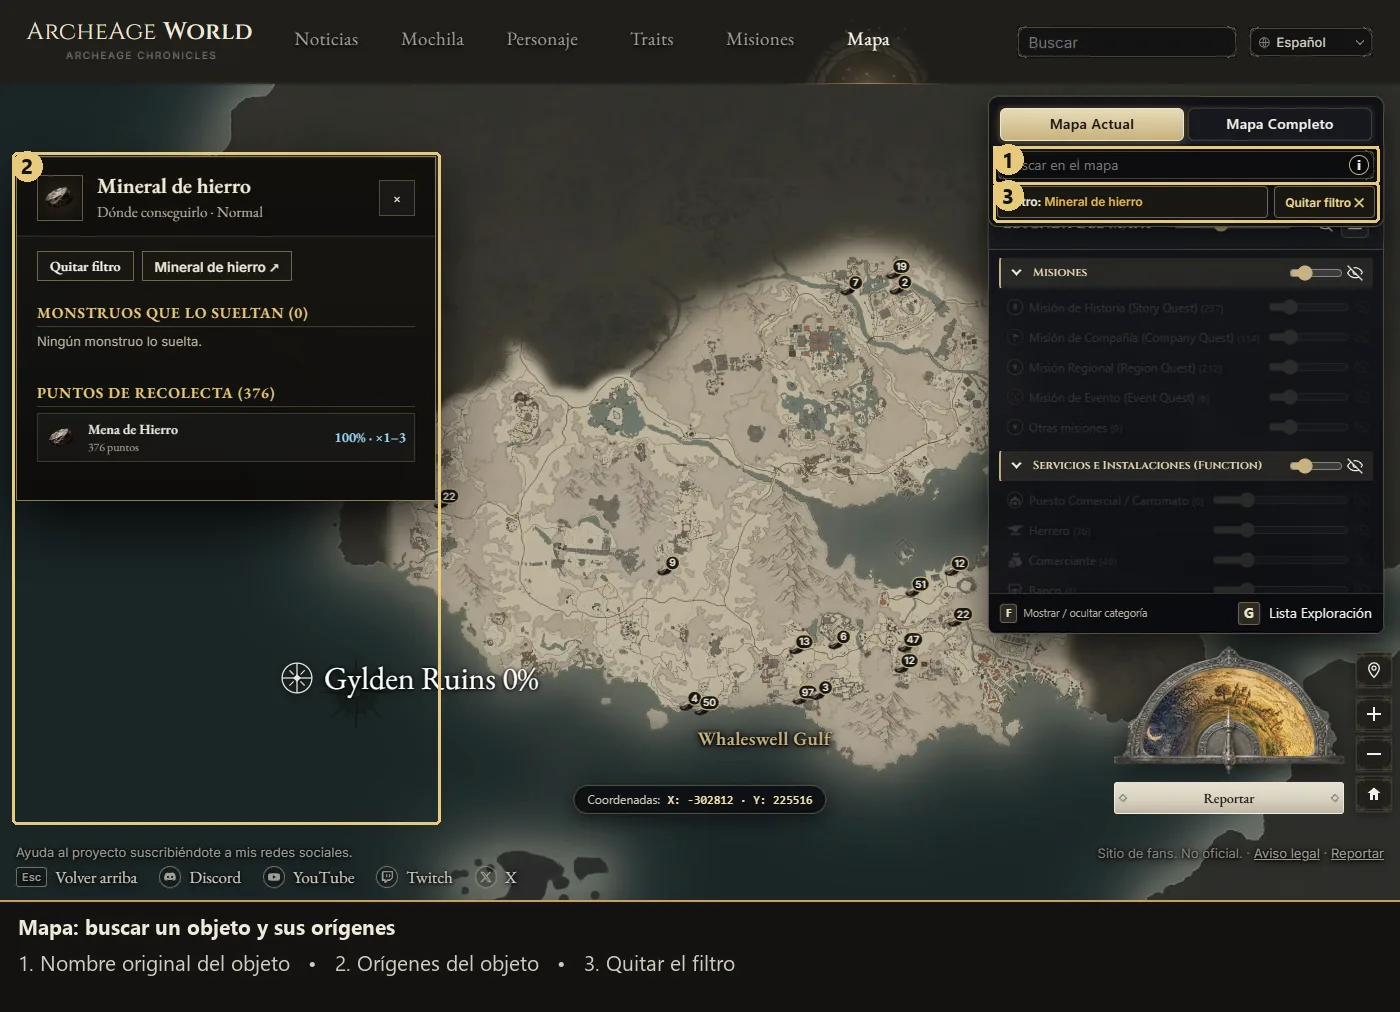
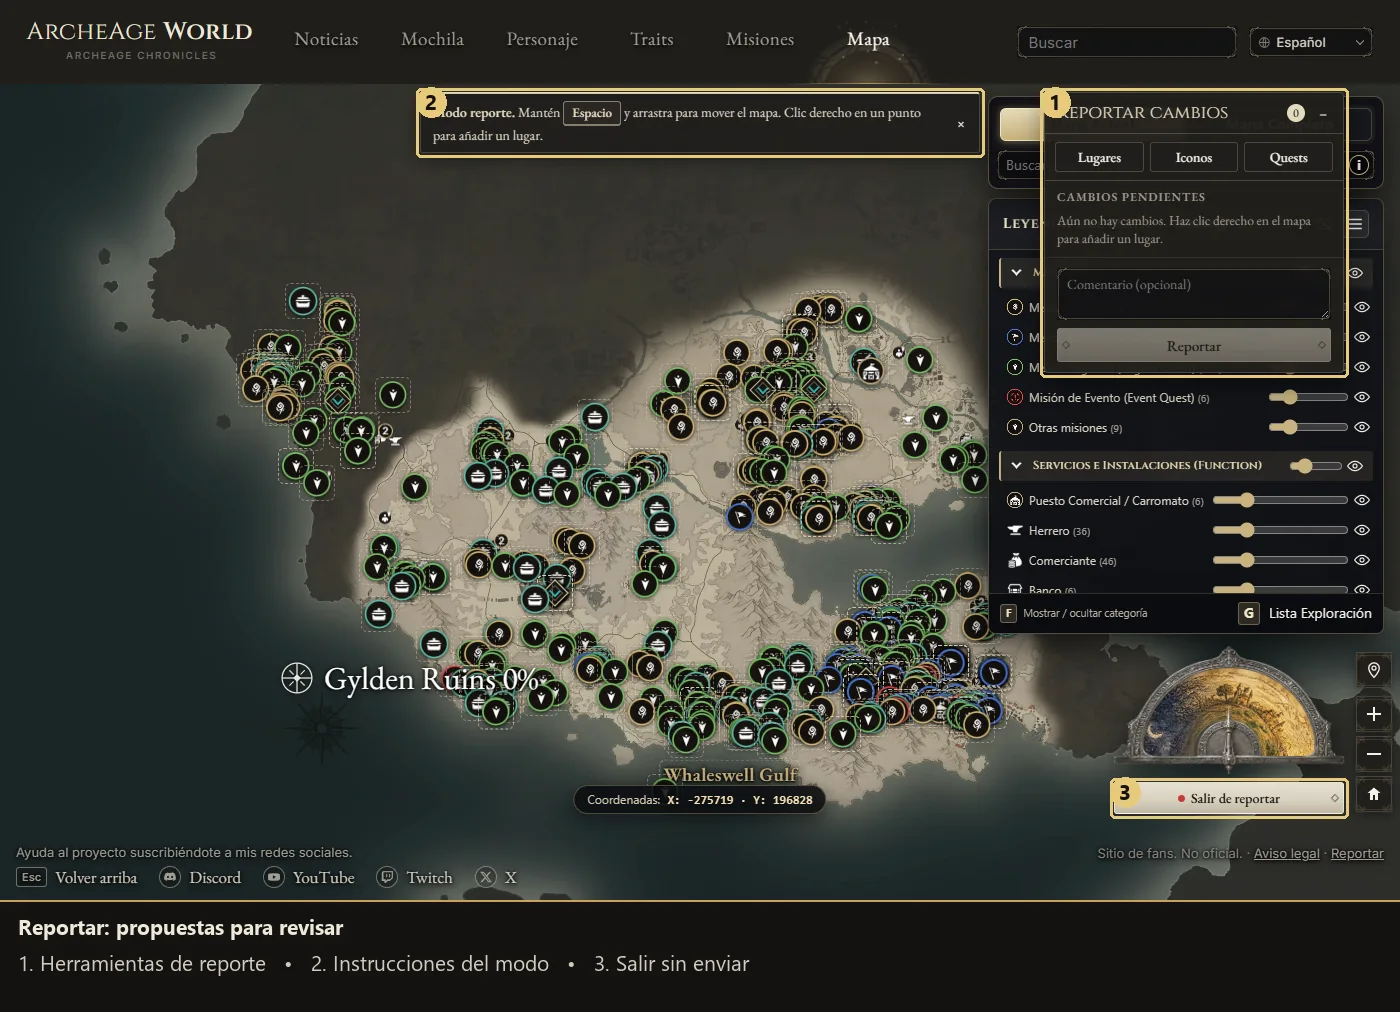
9. Exploration: your progress checklist
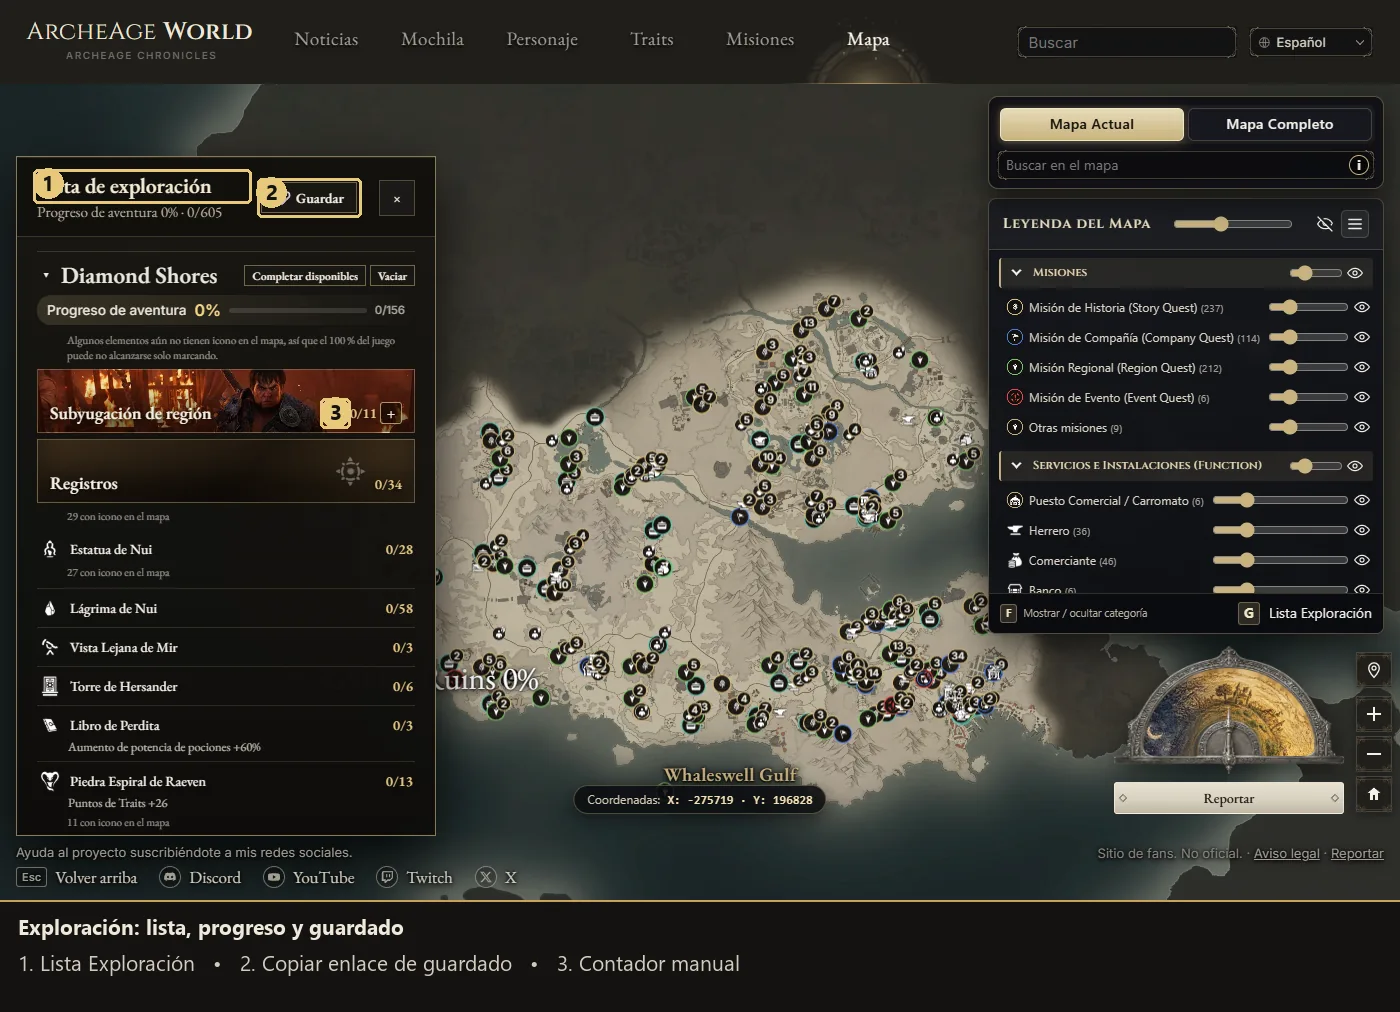
- Complete: open the Exploration List with G or its button, tick discoveries and jump from a row to its marker.
- Regions: inspect percentages and categories; Subjugation uses a manual counter. Complete available cannot guarantee 100% when locations are missing.
- Save: copy the progress link to keep or transfer it. Opening a saved link replaces current progress, so save your existing state first if you need both.
- Content: cards may include cairn, statue and Coilstone riddles, requirements and rewards; Read note opens the associated document.
- Exploration groups: expand regions and categories, then use Complete available or Clear for that group. Other entries can be ticked but do not count towards the official percentage.
10. Items, Monsters and NPCs
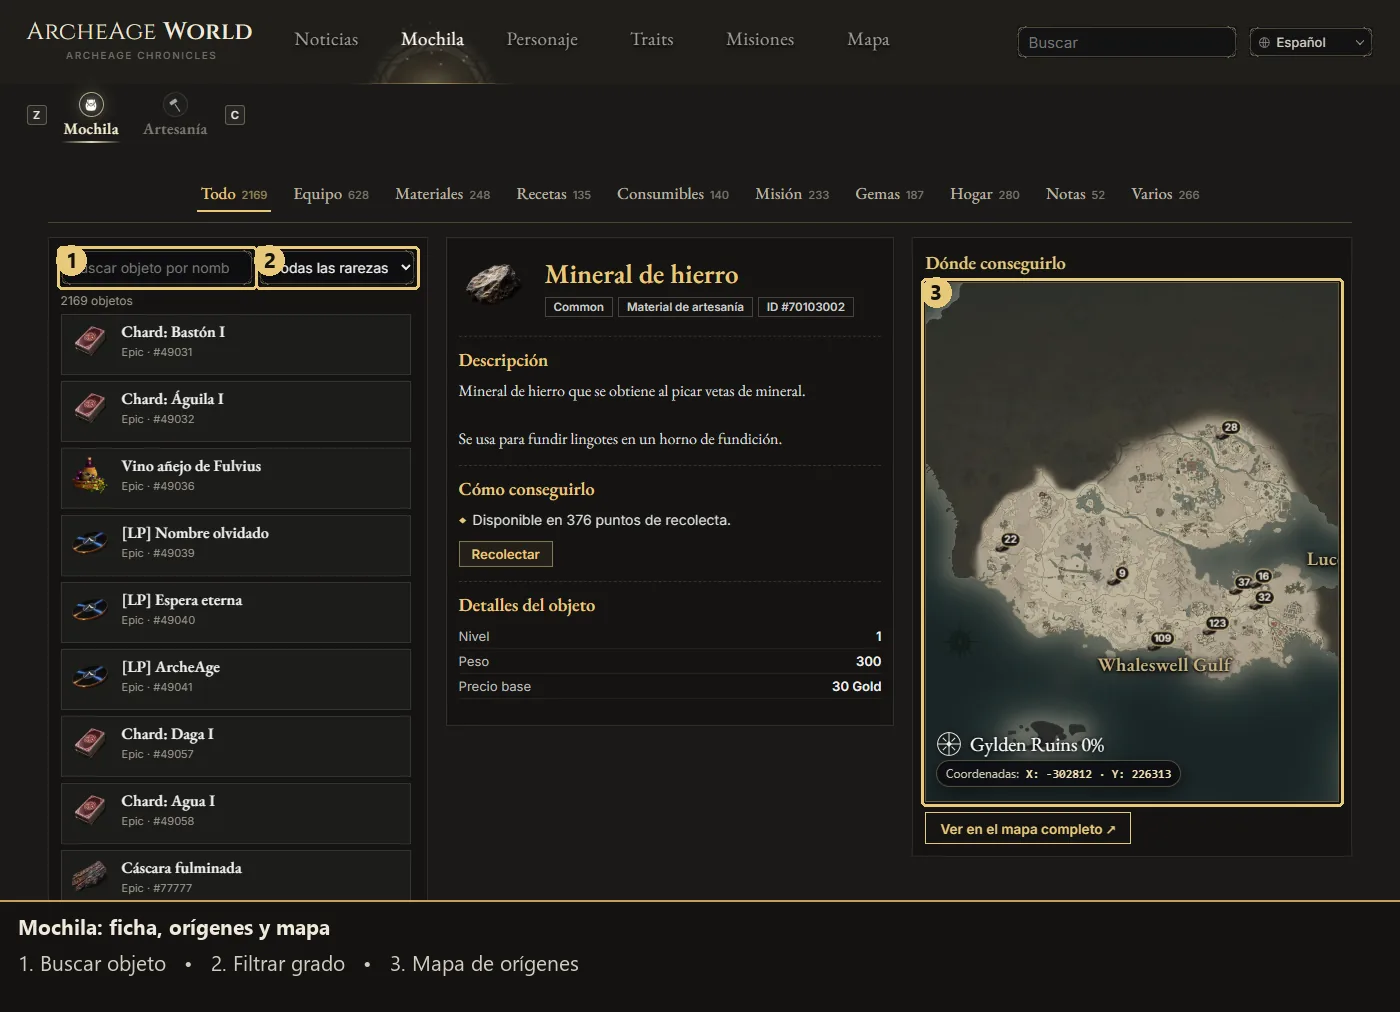
- Items: filter by category, text and grade; each entry combines its description, source buttons and a small map of available locations.
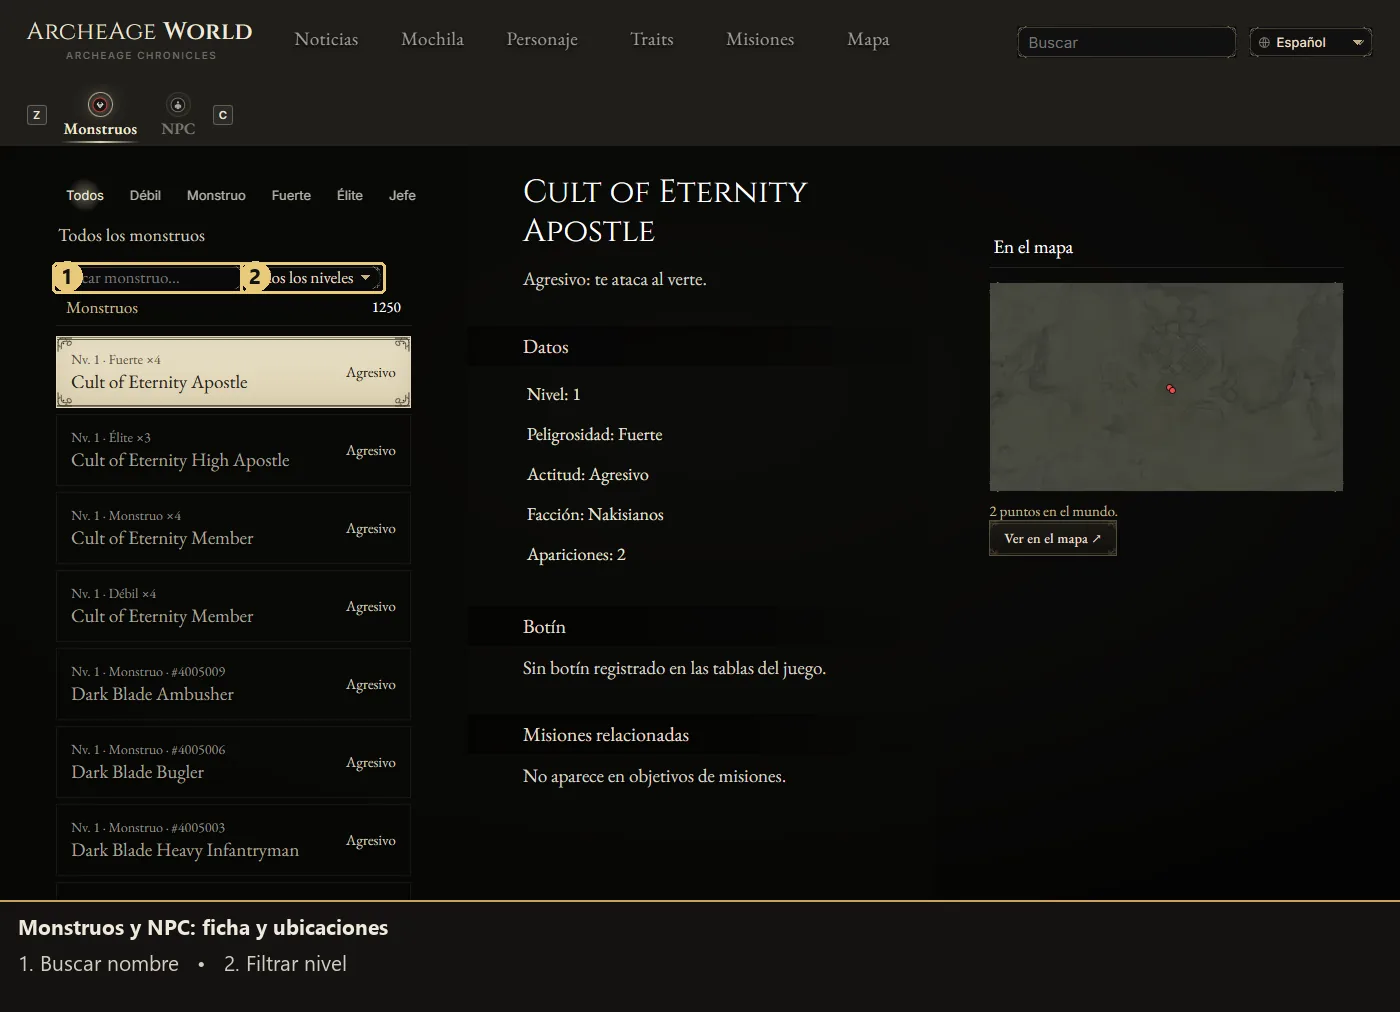
- Monsters: use the dedicated page, filter by category and level, then follow loot, related quests and spawn locations from the entry.
- NPCs: switch using the Monsters/NPC bar; inspect services, quests and locations. Map links preserve the selected element.
11. Records and full search
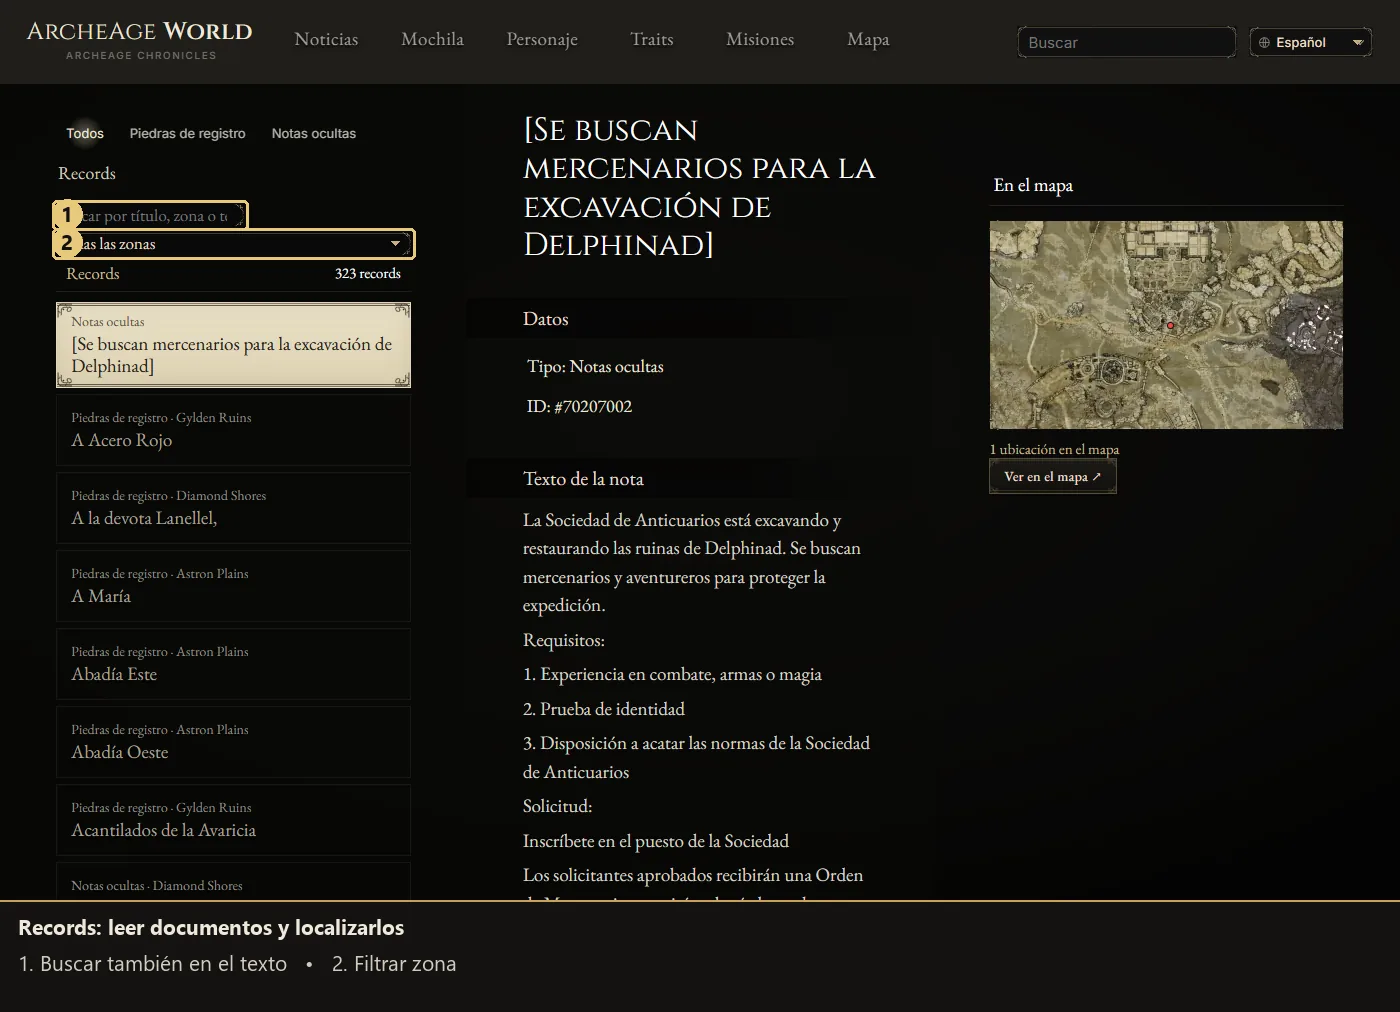
- Records: the new library gathers record stones and hidden notes; search by title, zone or text, filter the region and read a document alongside its locations.
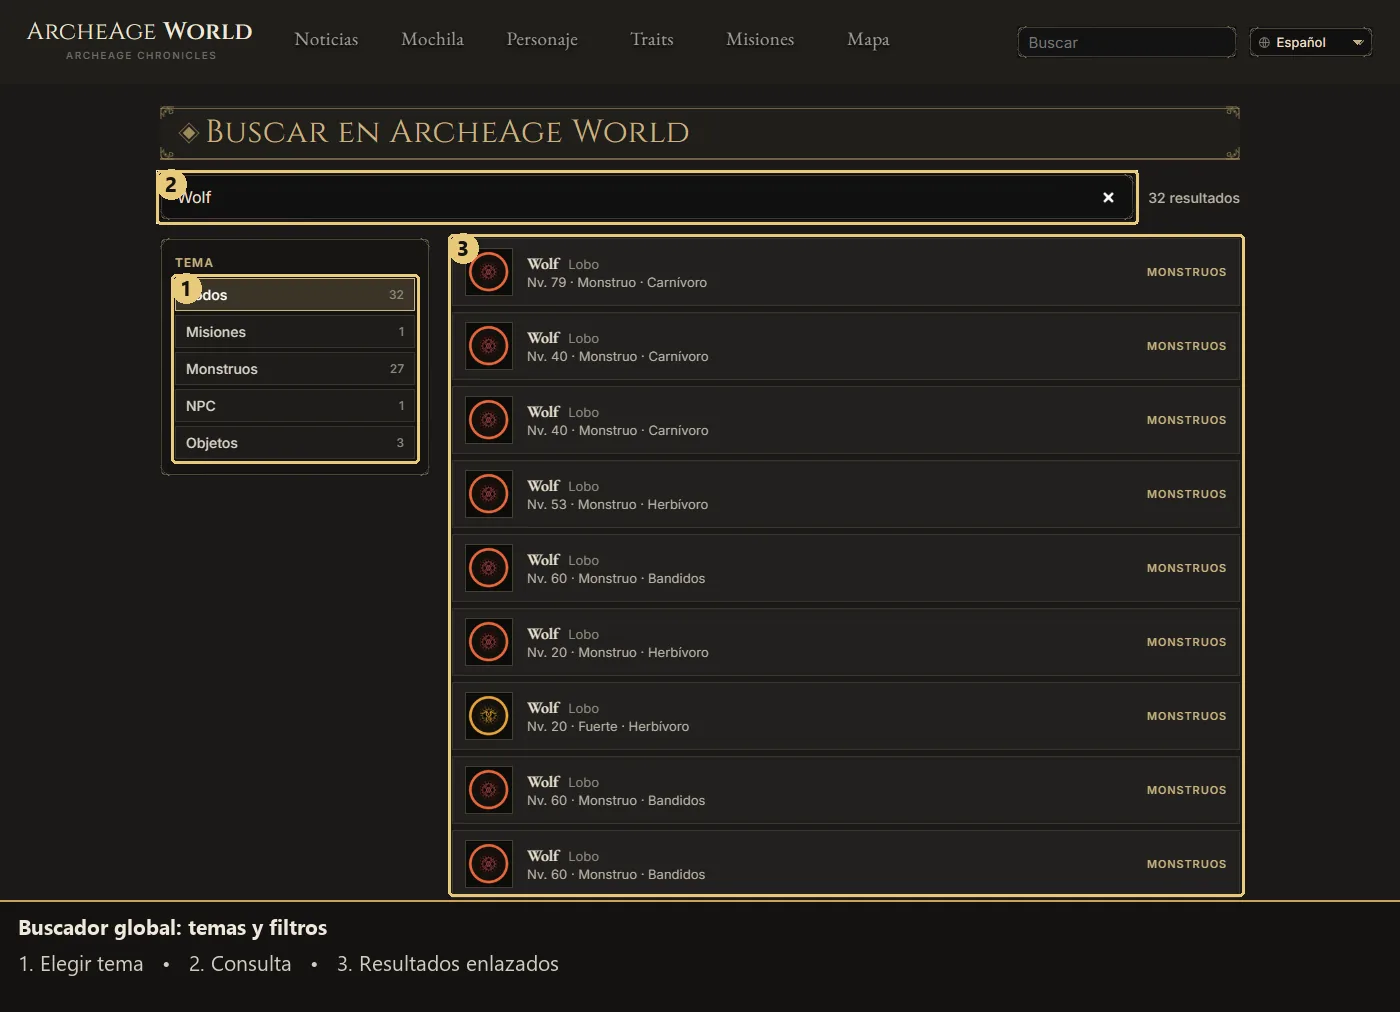
- Global search: at /search/, combine your query with a topic and its specific filters; Show more expands results and each entry links to its page.
12. Community: companies, guilds and housing
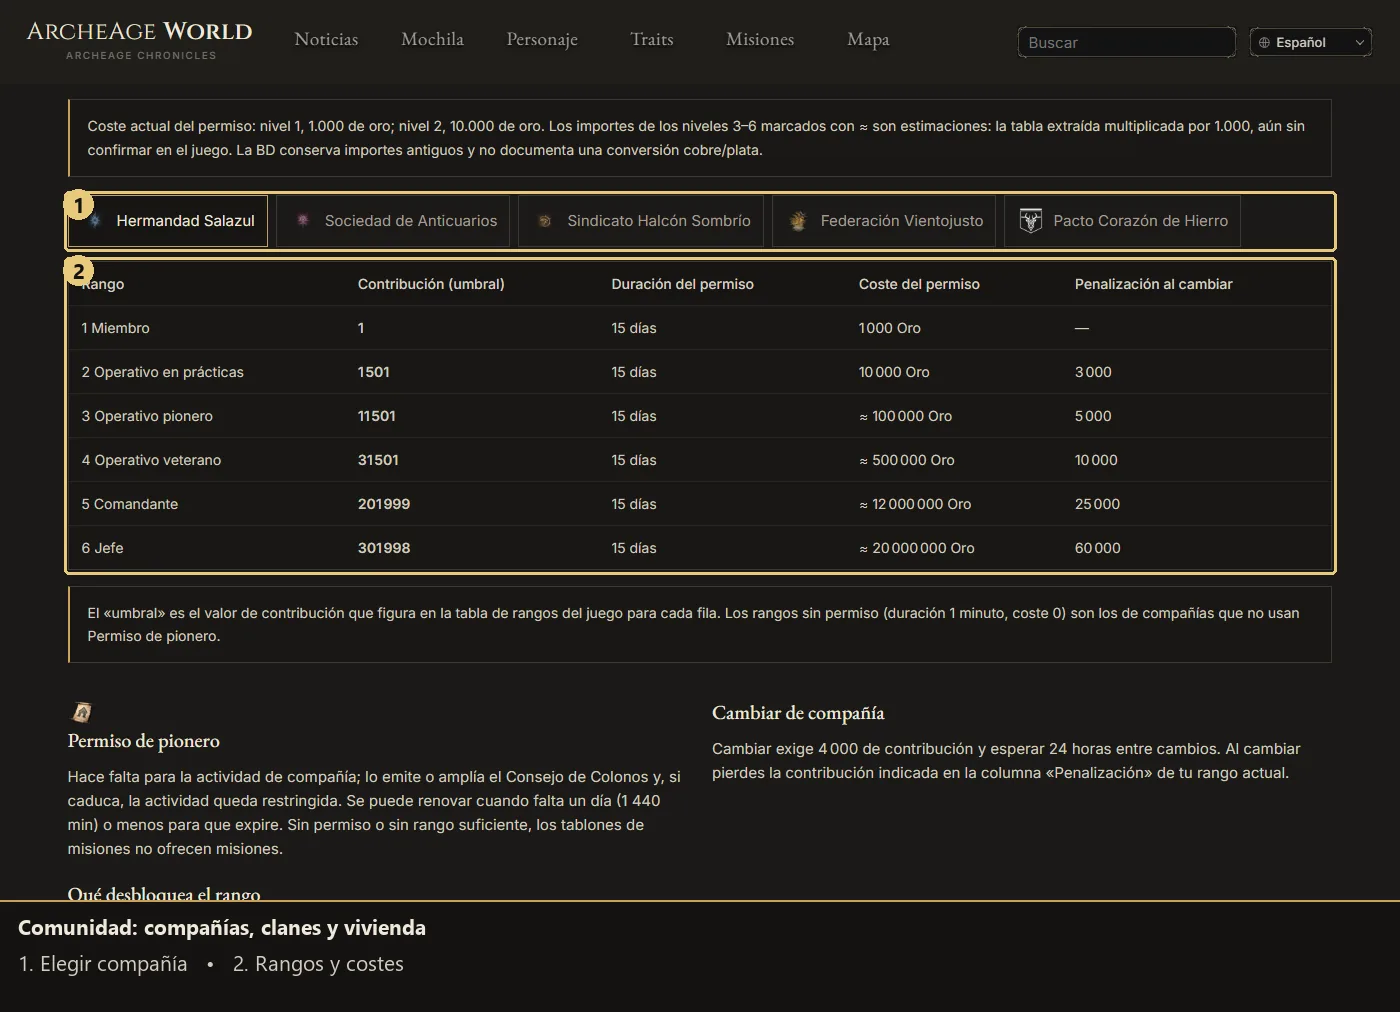
- Companies: at /community/, use the contents links for ranks, contribution, permits and boards; change company tabs to compare requirements and costs.
- Guilds and housing: inspect guild founding and levels, plots, rent and home upgrades; follow item and quest links. Estimated costs are distinguished from confirmed ones.
- Reading: tables scroll sideways on narrow screens while the page keeps normal vertical scrolling.
13. Lore and mobile use
- Lore: the arc/chapter index, search and filters help locate stories. Desktop Read aloud explains an external extension; it is not built-in audio and installs nothing automatically.
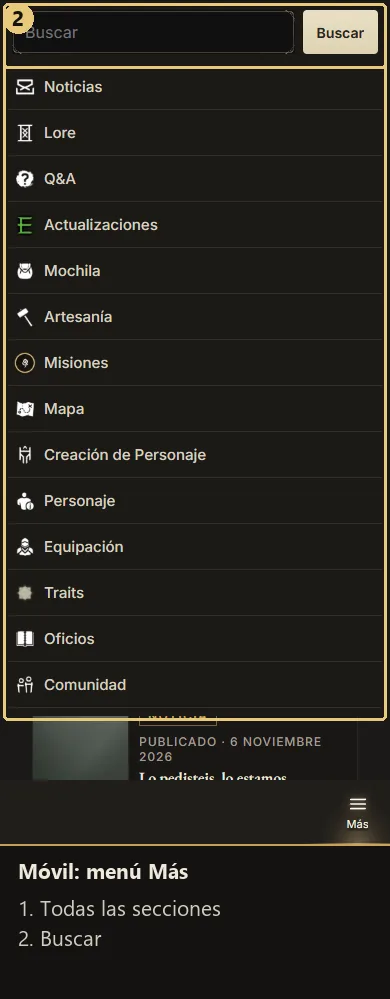
- Mobile menu: use the bottom bar and More for sections, search and languages; dismiss the drawer using its close button or the area outside.
- Touch tools: open item filters with their button, return from quest details to the list, and use the Traits options panel and zoom/move buttons. Open the map legend when needed.
- Comfort: visible buttons replace keyboard shortcuts, and bottom spacing keeps content clear of navigation. A normal reload loads the new resource version once this update is published.